
Assign activities
Assign activities/services to process steps
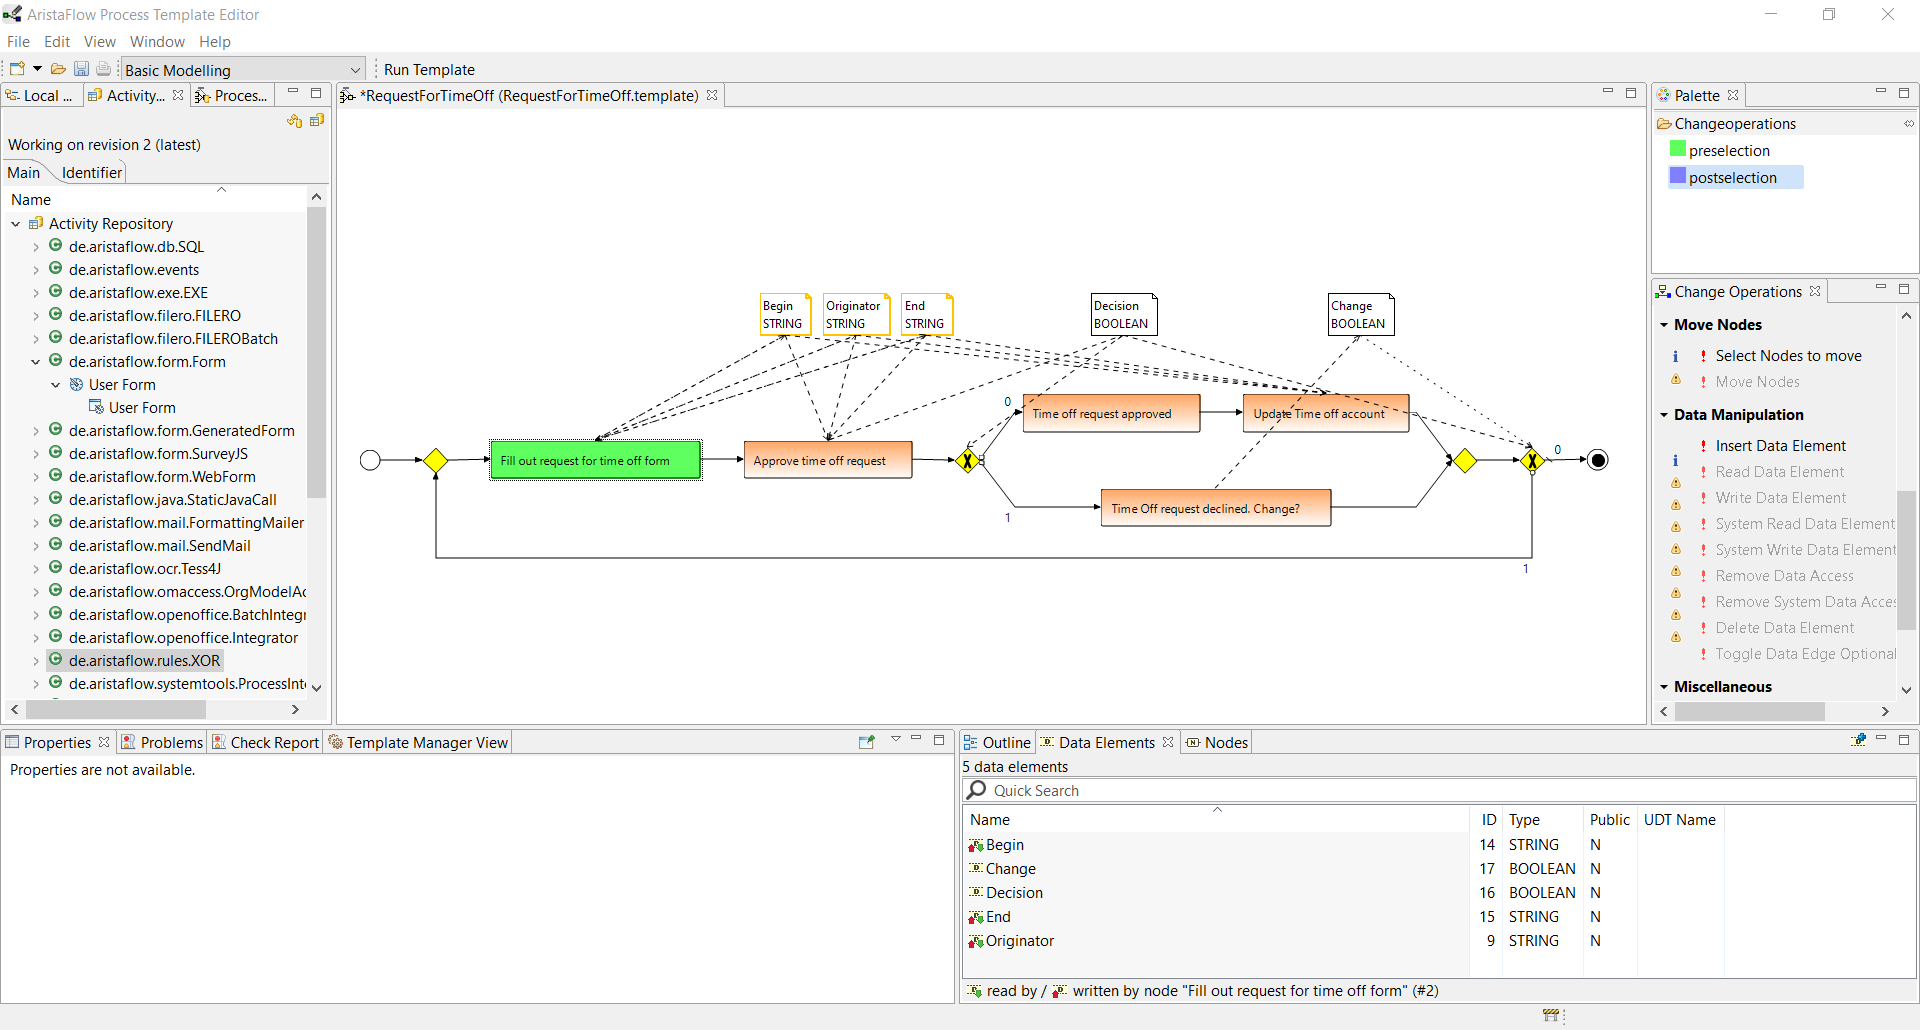
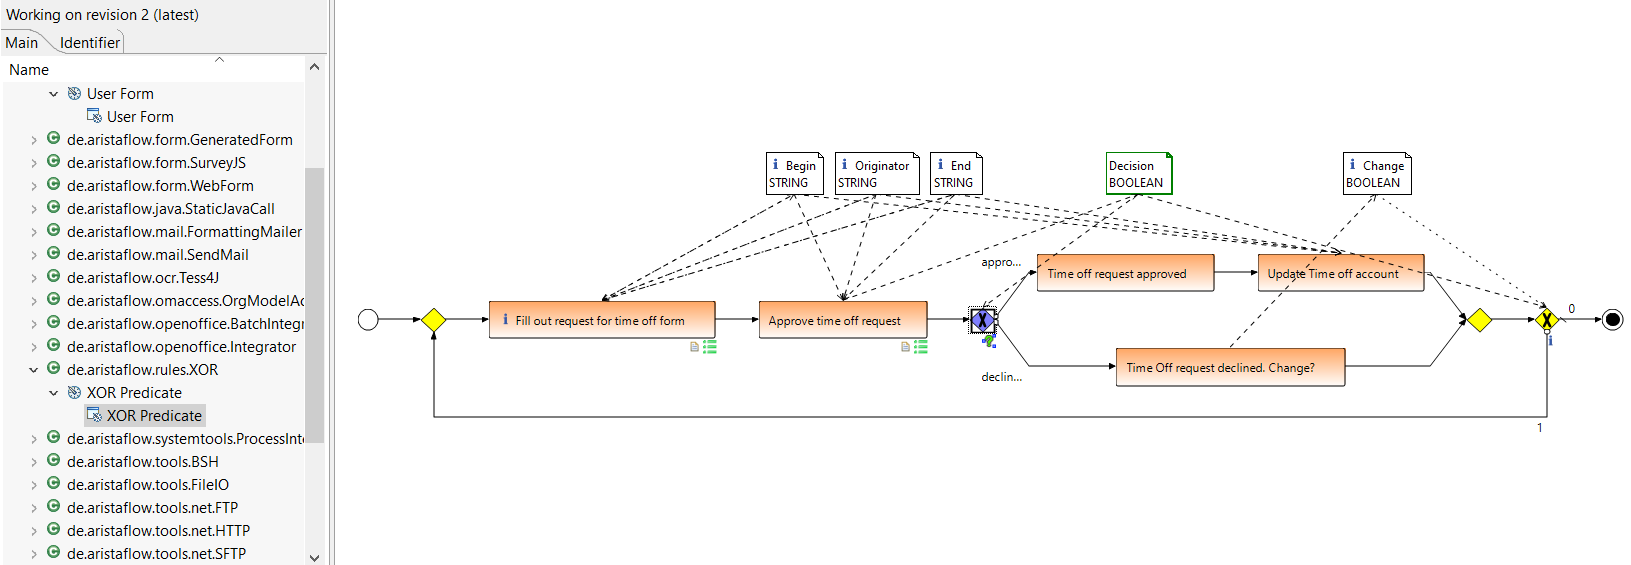
So far we modeled the control flow and the data flow of our business process. This can be very useful to get a first impression on how the automated process will look like and is a perfect technique to get an equal understanding on customer’s requirements (Rapid Prototyping). For a productive operation of our process we have to assign activities / services to the process steps from the Activity Repostitory (the Tab next to the AFResourceNavigator on the upper left side of the editor) to animate them.
For our “Request for time off” process simply select an activity by expanding the parent component and its operation in the Activity Repository, drag it, move it to the process step where you want to assign it and drop it there.
Example: Expand de.aristaflow.form.Form. Expand User Form and select its child User Form. Keep the mouse button down, move the pointer to the “Fill out request for time off” process step and release the button (drag’n’drop as usual).
An activity template specific wizard opens which guides you through the following steps.
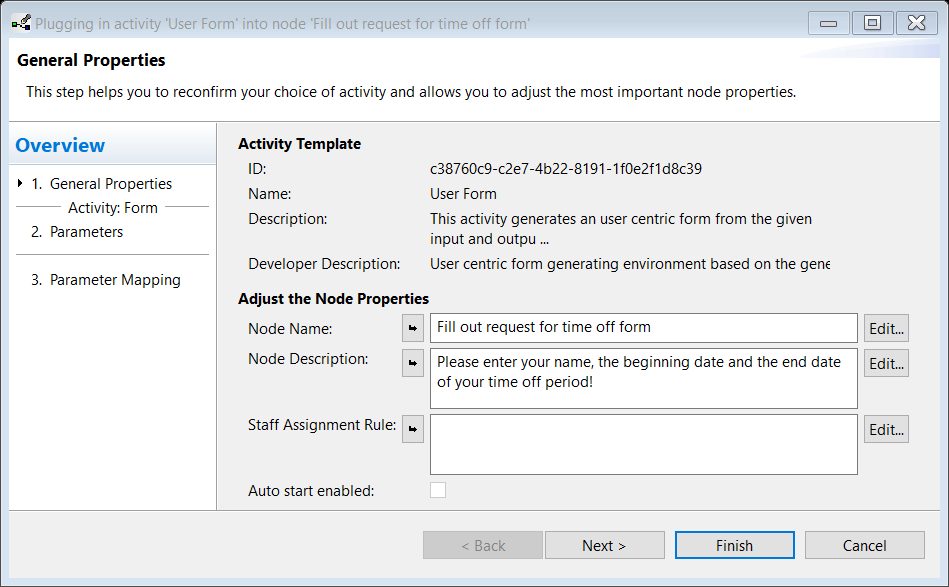
You can enter a description in the Node Description field to specify the process step more precisely. In case of the “User Form” activity this description is also shown as header for the form at runtime. Enter something like “Please enter your name, the beginning date and the end date of your time off period”. Furthermore you can assign staff which is allowed to execute this process step, but we will carry about that later.
Hint:
Some of the activity templates already offer suggestions for Node Name and Node Description. Press the arrow button in front of the input fields to take them over.
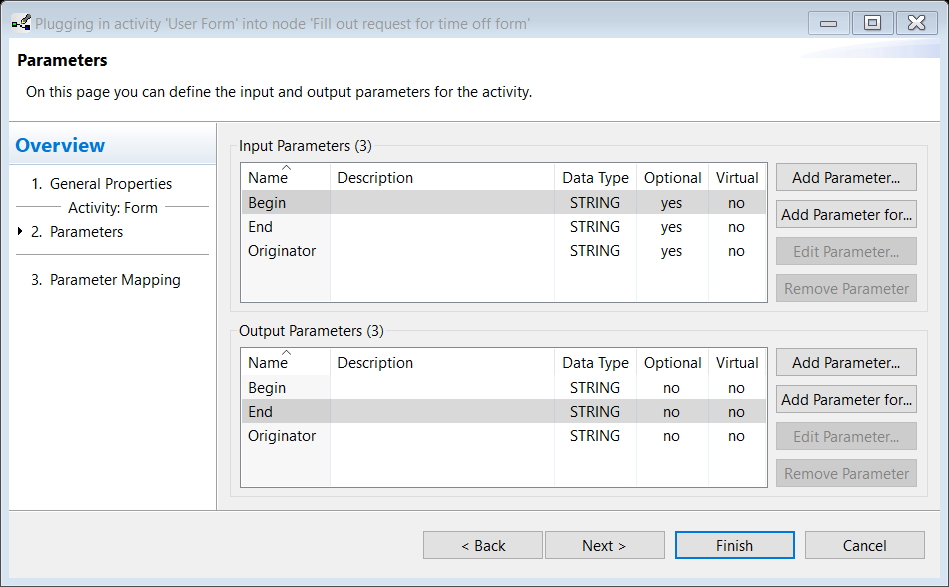
Go on with Next > to the parameters page. Here you can manage all input and output parameters of the process step.
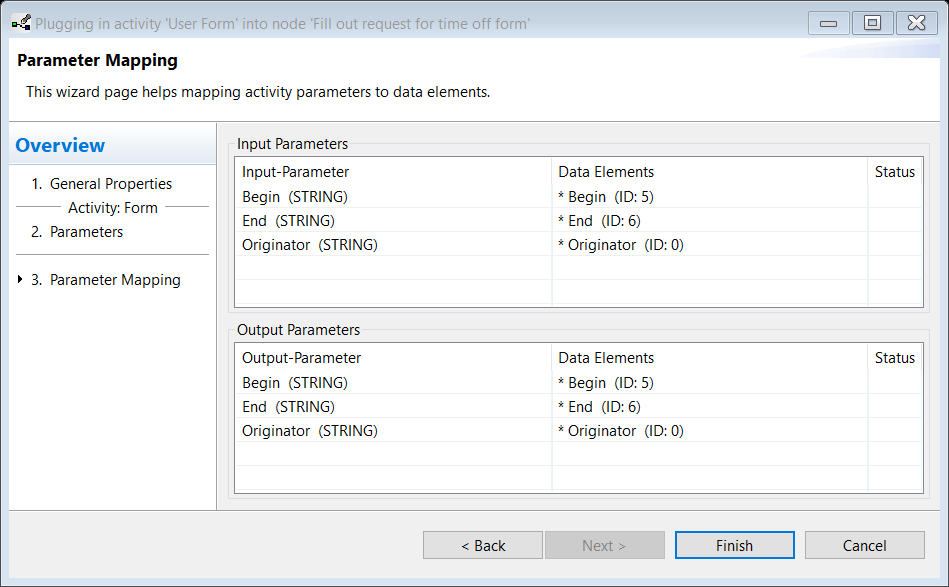
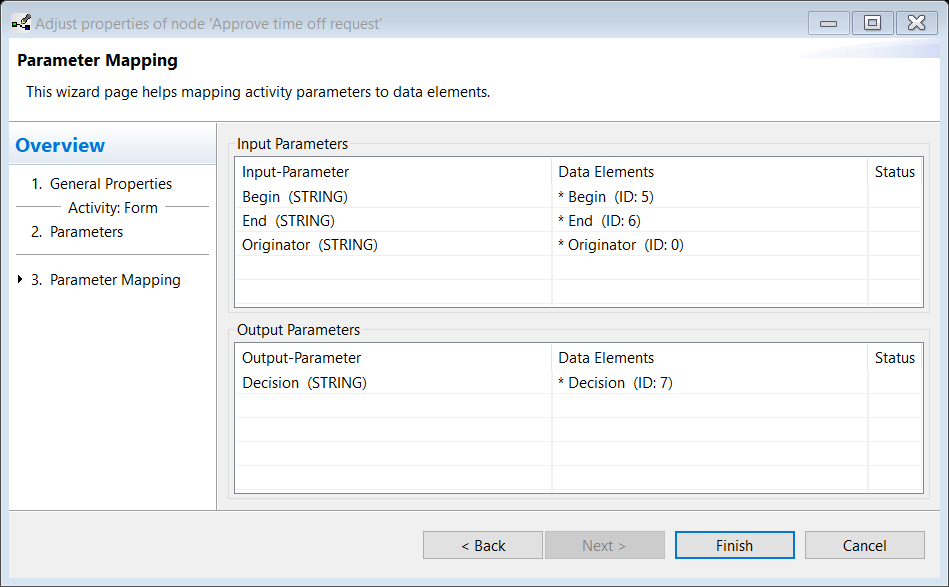
The next wizard page offers a suggestion on how to map the input and output parameters of the process step to the process data elements. Thereby only those data elements are selectable in the drop down boxes which are compliant to the related parameter of the activity (Correctness by Construction paradigm). The asterisk signals that the selected data element is already connected to the process step via data edge. In our example the suggested mapping already matches so we can finish the wizard without further changes.
Assign the other activities to the process steps:
- Process step “Approve time off request”:
de.aristaflow.form.Form -> User Form -> User Form. Enter a description like “Please approve / decline the request for time off”, check the mapping (should match already) and finish the wizard.
- Process step “approved / declined”:
de.aristaflow.rules.XOR -> XOR Predicate -> XOR Predicate.
This is a special activity for defining branch decisions of simple to arbitrary complex type (business rules). The special feature of this AristaFlow activity is the check that all possible input value combinations used for the decision are mapped to an outgoing branch. Situations where you make a decision like “> 1000” then take branch X and “< 1000” then take branch Y and you forgot “= 1000” are checked automatically at buildtime and is shown to the user. The situation described in the example is simple, but the check also applies for arbitrary complex decisions with many parameters involved.
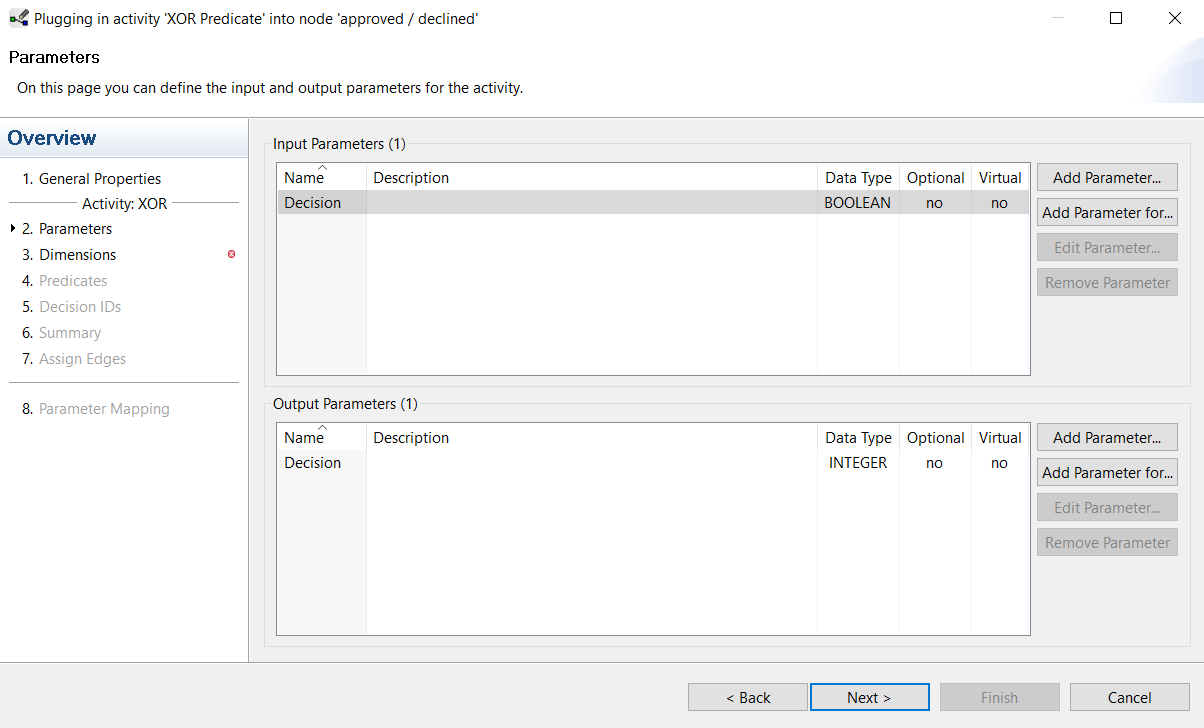
We turn back to the configuration of the decision activity. We switch to the second page with is equal to the parameter page of the User Form activity. In this case the listed Input Parameters are the parameters which are used in our branch decision (business rule). Since the process step already contains ingoing data edges compliant parameter were created automatically. The Output Parameter “Decision” is a system parameter and is always created. Do not change it.
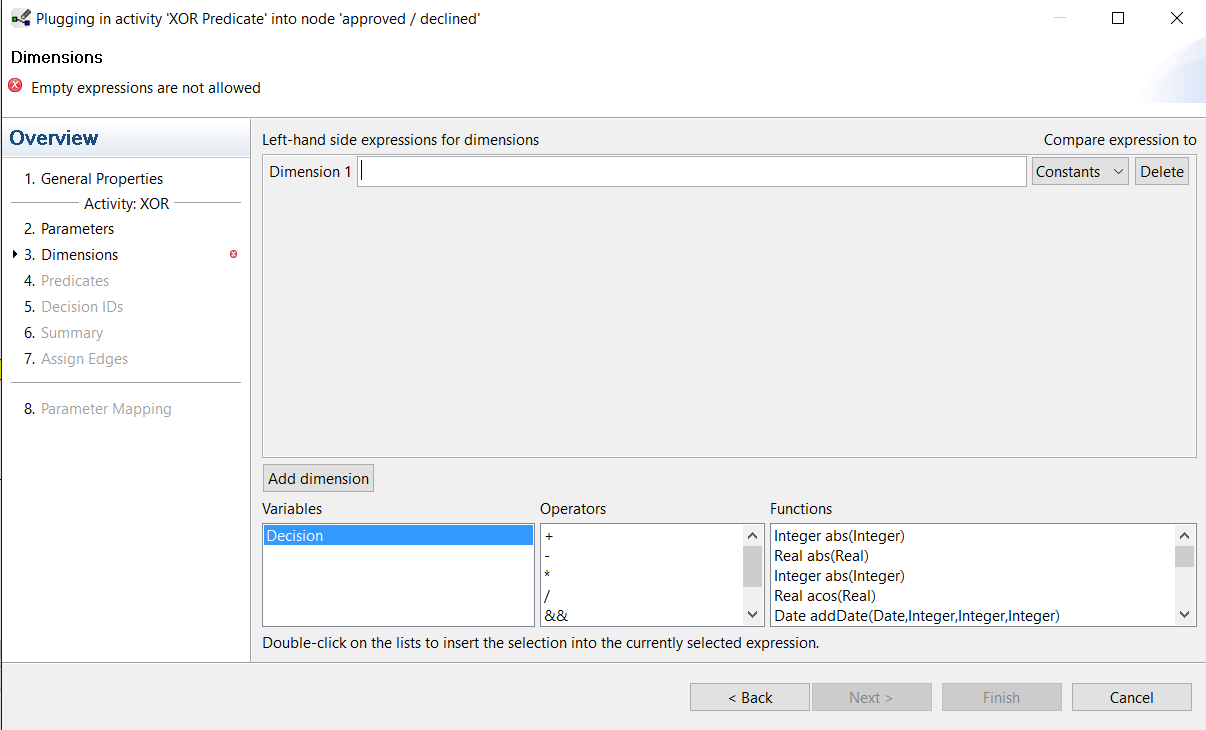
On the next wizard page we define the dimensions of the decision. For a better understanding of the term dimension you can consider a solution space which covers all values for a certain type. For example Boolean would have a solution space of true and false while Integer would have one from -231 to 231-1. The challenge for the decision activity is now to guarantee that the whole solution space is covered if the user divides it by defining decision statements like value “< 1000” for Integer or value “= TRUE” for Boolean.
For our simple example with a single Boolean value we only have to double-click Decision and switch to the next page.
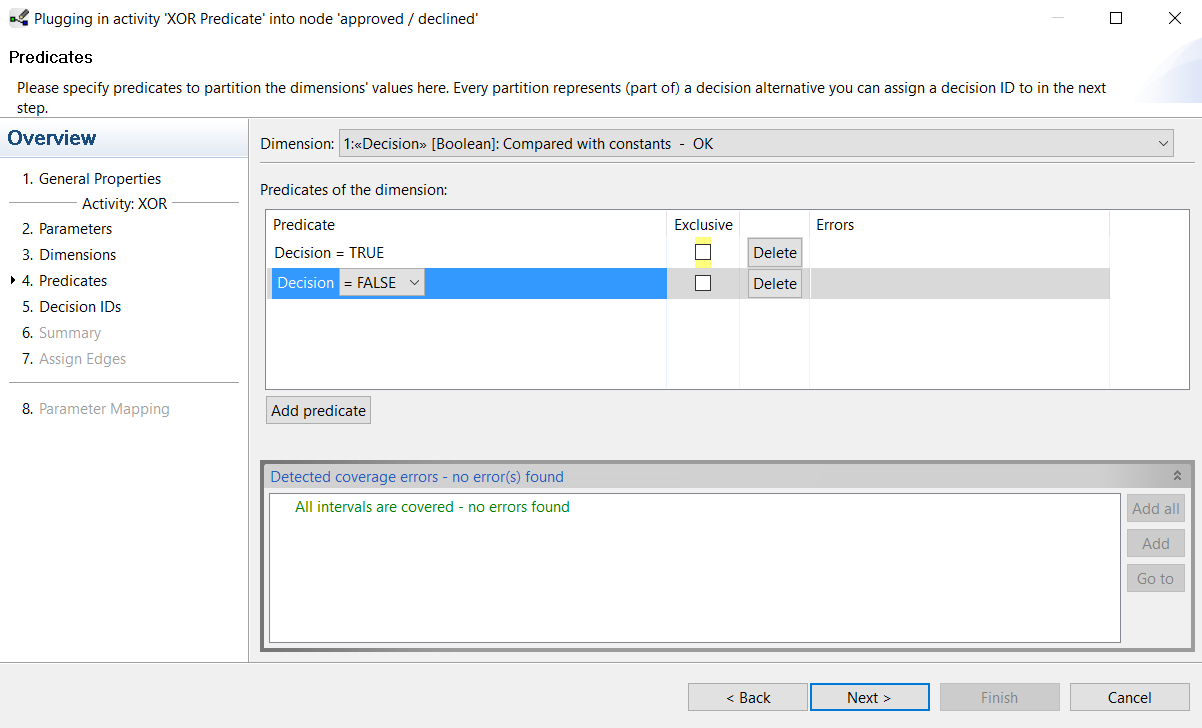
On this page the predicates and the values for the dimensions are specified. As you can see from the following screenshot the XOR wizard calculates the uncovered values automatically. In our example only the case “Decision = TRUE” is covered already. To cover the value “Decision = FALSE” click the Add Predicate button and select false in the drop down box. Alternatively you can select “Add all” to complete the decision values for our input parameter.
On the next wizard page you have to assign decision IDs to the predicates. Select “Decision = TRUE” and click the Add Auto button to create an ID automatically or enter your own ID in the input field and choose Set.

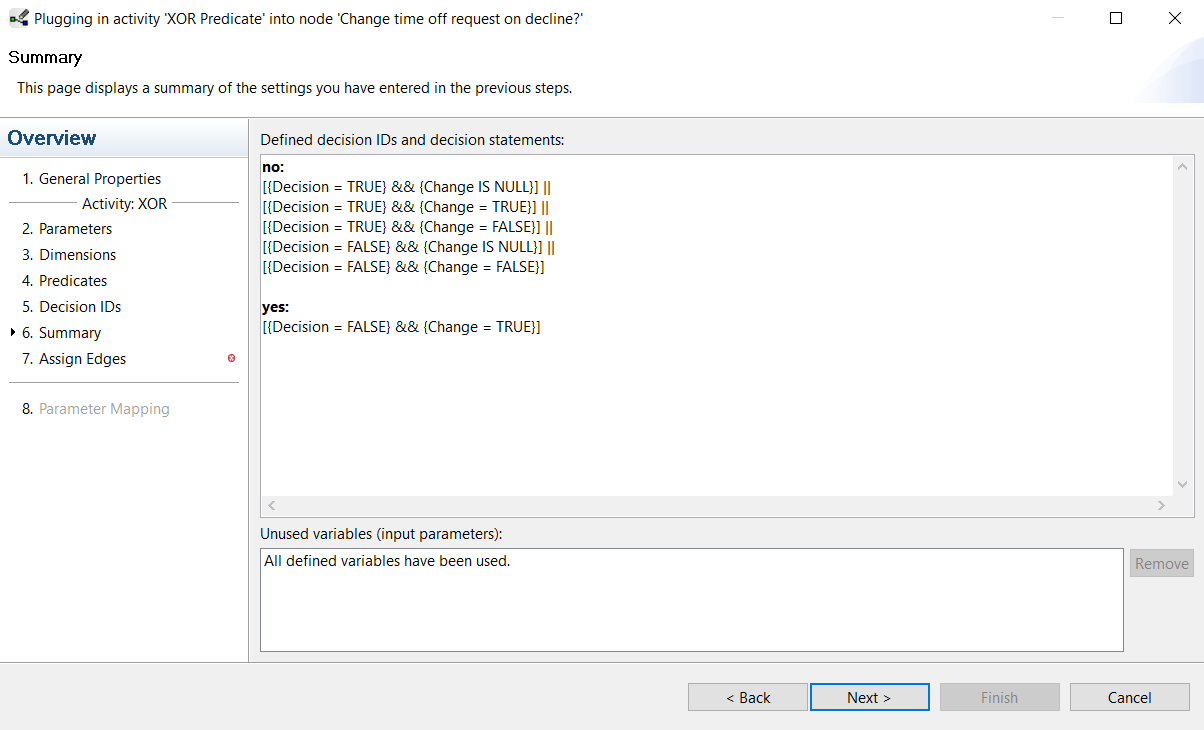
We enter our own ID and call it “approved“. For “Decision = FALSE” we enter “declined” and switch to the summary page for an overview on our branch decision.
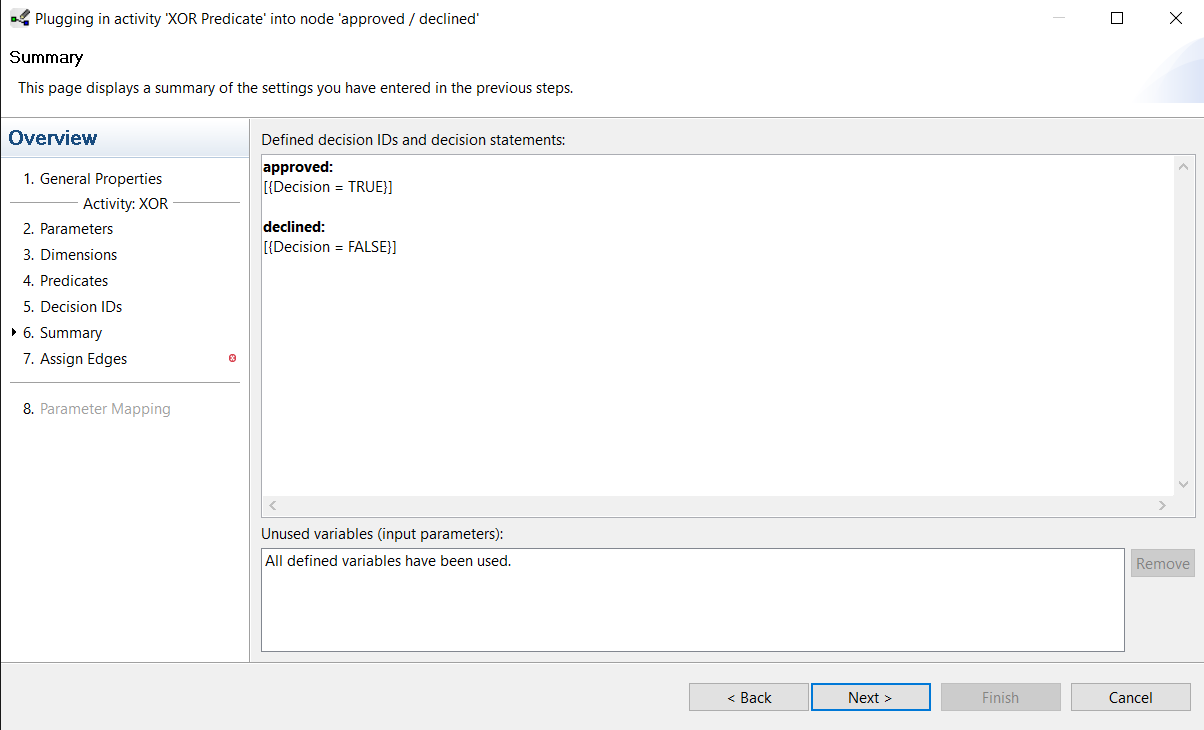
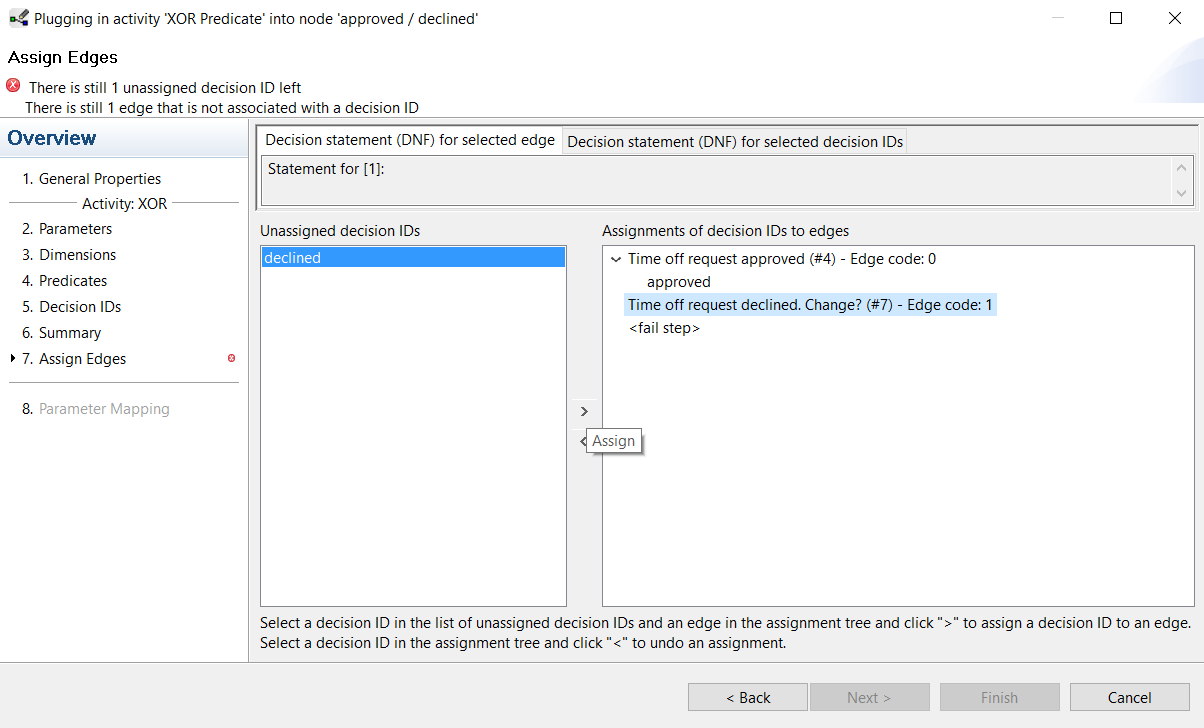
In the next step the decision IDs are connected to the outgoing branches of the decision split node. Select the decision ID “approved” and the branch with the node “Time off request approved” and connect them by clicking the arrow button. Connect the “declined” ID with “Time off request declined. Change?“ accordingly.
To finish the decision wizard the parameters have to be mapped to the data flow using the already known mapping dialogue. The mapping for the input parameter “Decision” should be valid already. For the system output parameter “Decision” select
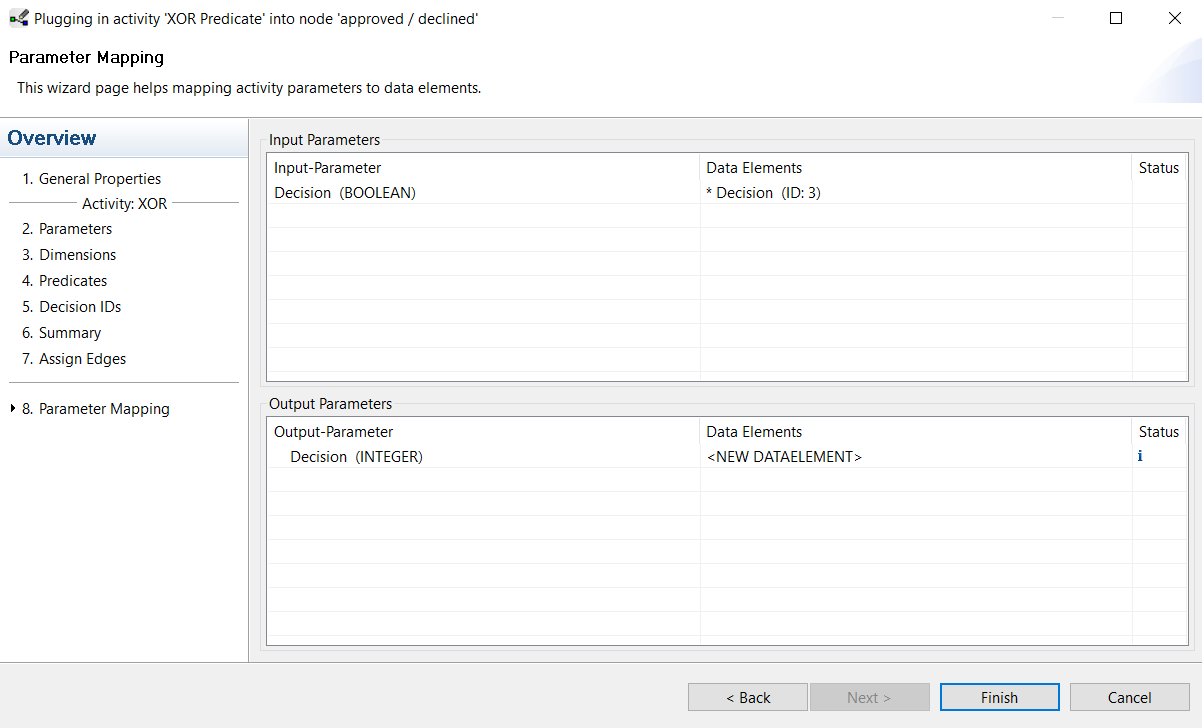
Close the wizard with the Finish button. Now you can see on the decision activity’s outgoing control flow edges which branch is selected in accordance to the input value.
- Process step “Time off request approved”:
de.aristaflow.form.Form -> User Form -> User Form.
Enter a description like “Your request for time off has been approved.” and finish the wizard. - Process step “Update time off account”:
de.aristaflow.form.Form -> User Form -> User Form.
Enter a description like “Please update the request for time off account for the following person:”, check the mapping (should match already) and finish the wizard. - Process step “Time off request declined. Change?”:
de.aristaflow.form.Form -> User Form -> User Form.
Enter a description like “Your request for time off was declined. Do you want to change it?”, check the mapping (should match already) and finish the wizard. - Process step “Change time off request on decline?”:
We have to create a decision on this loop end node, so assign de.aristaflow.rules.XOR -> XOR Predicate -> XOR Predicate. Create two dimensions one for the “Change” and another one for the “Decision” input parameter by clicking on Add dimension. Take “Decision” as first dimension and “Change” as second dimension by double click on the parameters.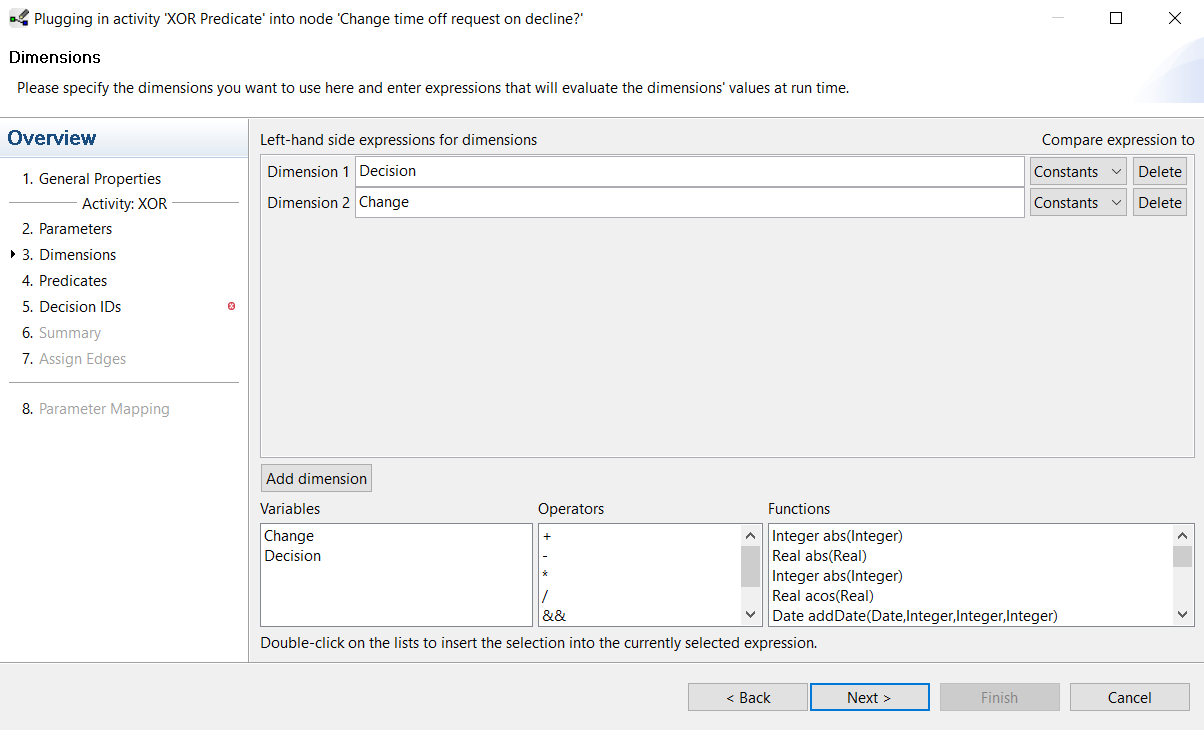 On the next wizard page click the Add All button (bottom right) for the “Decision” dimension and switch to the “Change” dimension (drop down box at the top) and create the predicates “Change IS NULL“, “Change = TRUE” and “Change = FALSE” for the “Change” dimension.
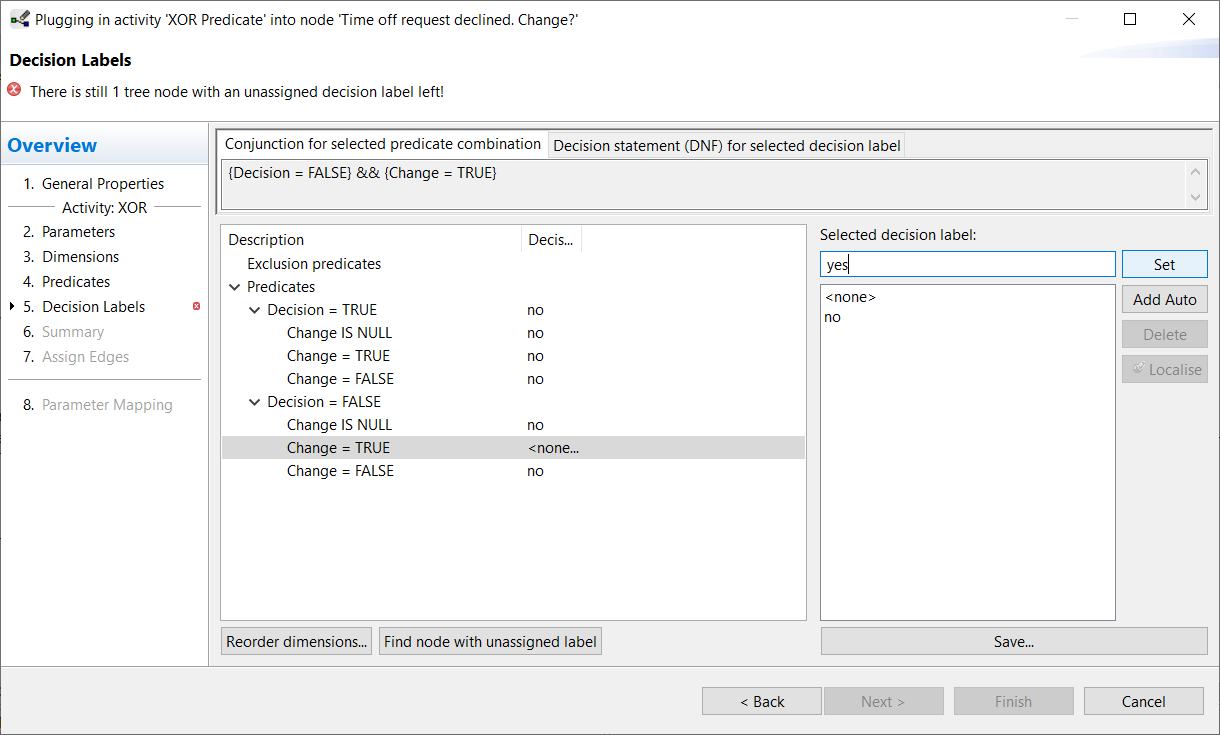 On the Decision IDs wizard page make sure the dimensions are ordered in the sequence shown in the screenshot. If not click “Reorder dimensions”.
Select “Decision = TRUE”, enter “No” in the decision ID text box and press the Set button. Assign “No” to “Change = FALSE” and “Change IS NULL” and “Yes” to “Change = True” in the branch under “Decision = FALSE”. Check the result on the next page.
On the Decision IDs wizard page make sure the dimensions are ordered in the sequence shown in the screenshot. If not click “Reorder dimensions”.
Select “Decision = TRUE”, enter “No” in the decision ID text box and press the Set button. Assign “No” to “Change = FALSE” and “Change IS NULL” and “Yes” to “Change = True” in the branch under “Decision = FALSE”. Check the result on the next page.
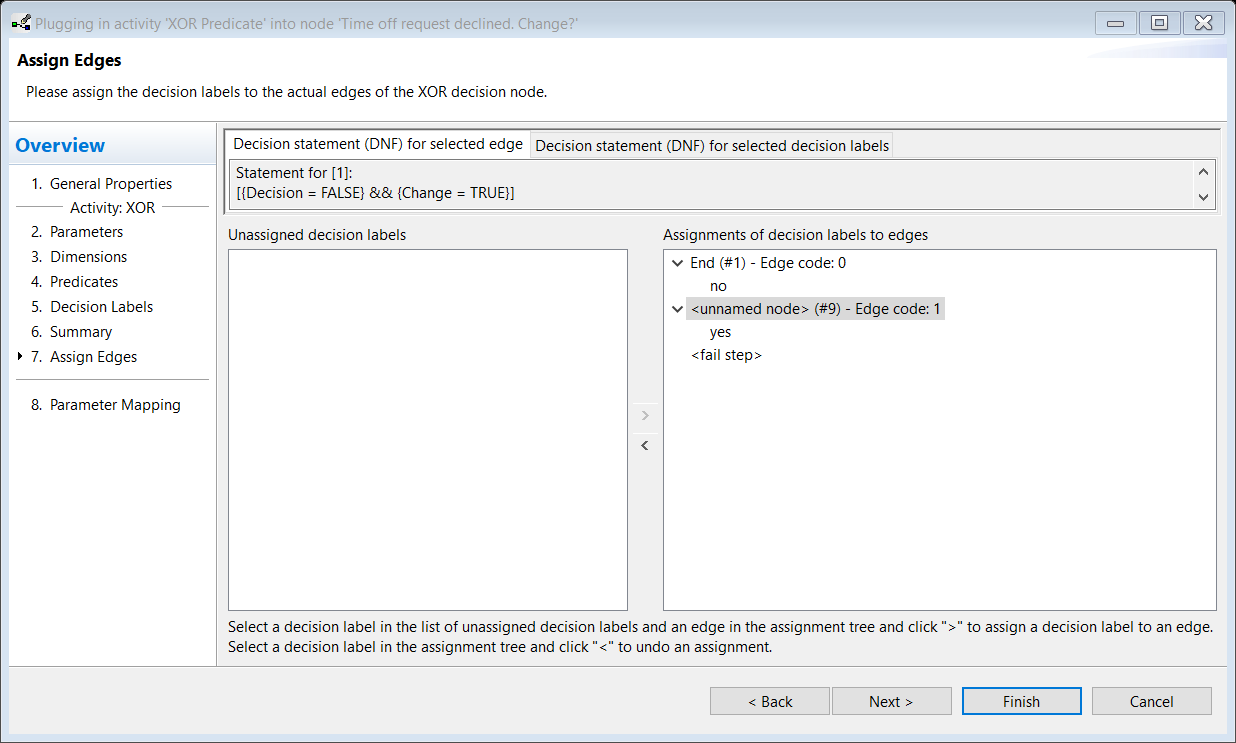
 Assign “No” to the branch with the End node to leave the loop and “Yes” to jump back to the beginning of the loop. Finish the wizard; the parameter mapping should be correct already.
 With the assignment of the decision activity all relevant process steps are provided with functionality. The last step to complete our “Request for time off” process is the staff assignment for the single process steps.