
Testing Workflow
Run Template on Test Client
As you have learned in the former sections the syntactical correctness of a process is checked automatically by the AristaFlow system during modeling. To check its semantical correctness, what means to check if the modeled process does really what it is supposed to do, we can use the AristaFlow Test Client to directly execute our business process on an embedded, non-persistent instance of the AristaFlow Server.
Note that you do not need to fully model your business process to execute it in the test client. You can do it in any state, no matter if you have created the data flow or if you have assigned services to the steps or not. So it can be perfectly used to show a customer how the process behaves at runtime at a very early stage.
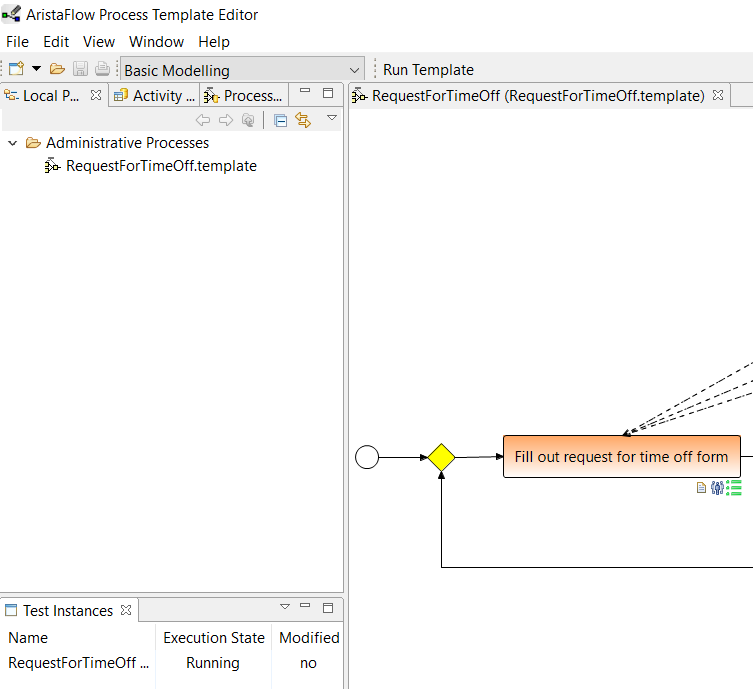
To execute the “RequestForTimeOff” process on the Test Client be sure that the “RequestForTimeOff” template is opened in the Process Template Editor and click the Run Template button at the top of the editor to open the process in the test client. A test instance is created automatically which is displayed in the Process Template Editor under “Test Instances” (on the left hand center). Now you can track the process behavior using this instance in the test client.
Alternatively you can start the AristaFlow Test Client from the Windows start menu under ...AristaFlow BPM Suite -> Test Client or in your installation folder (…/TestClient/TestClient.exe), but this is little more cumbersome since you have to load the template which you want to test by hand.
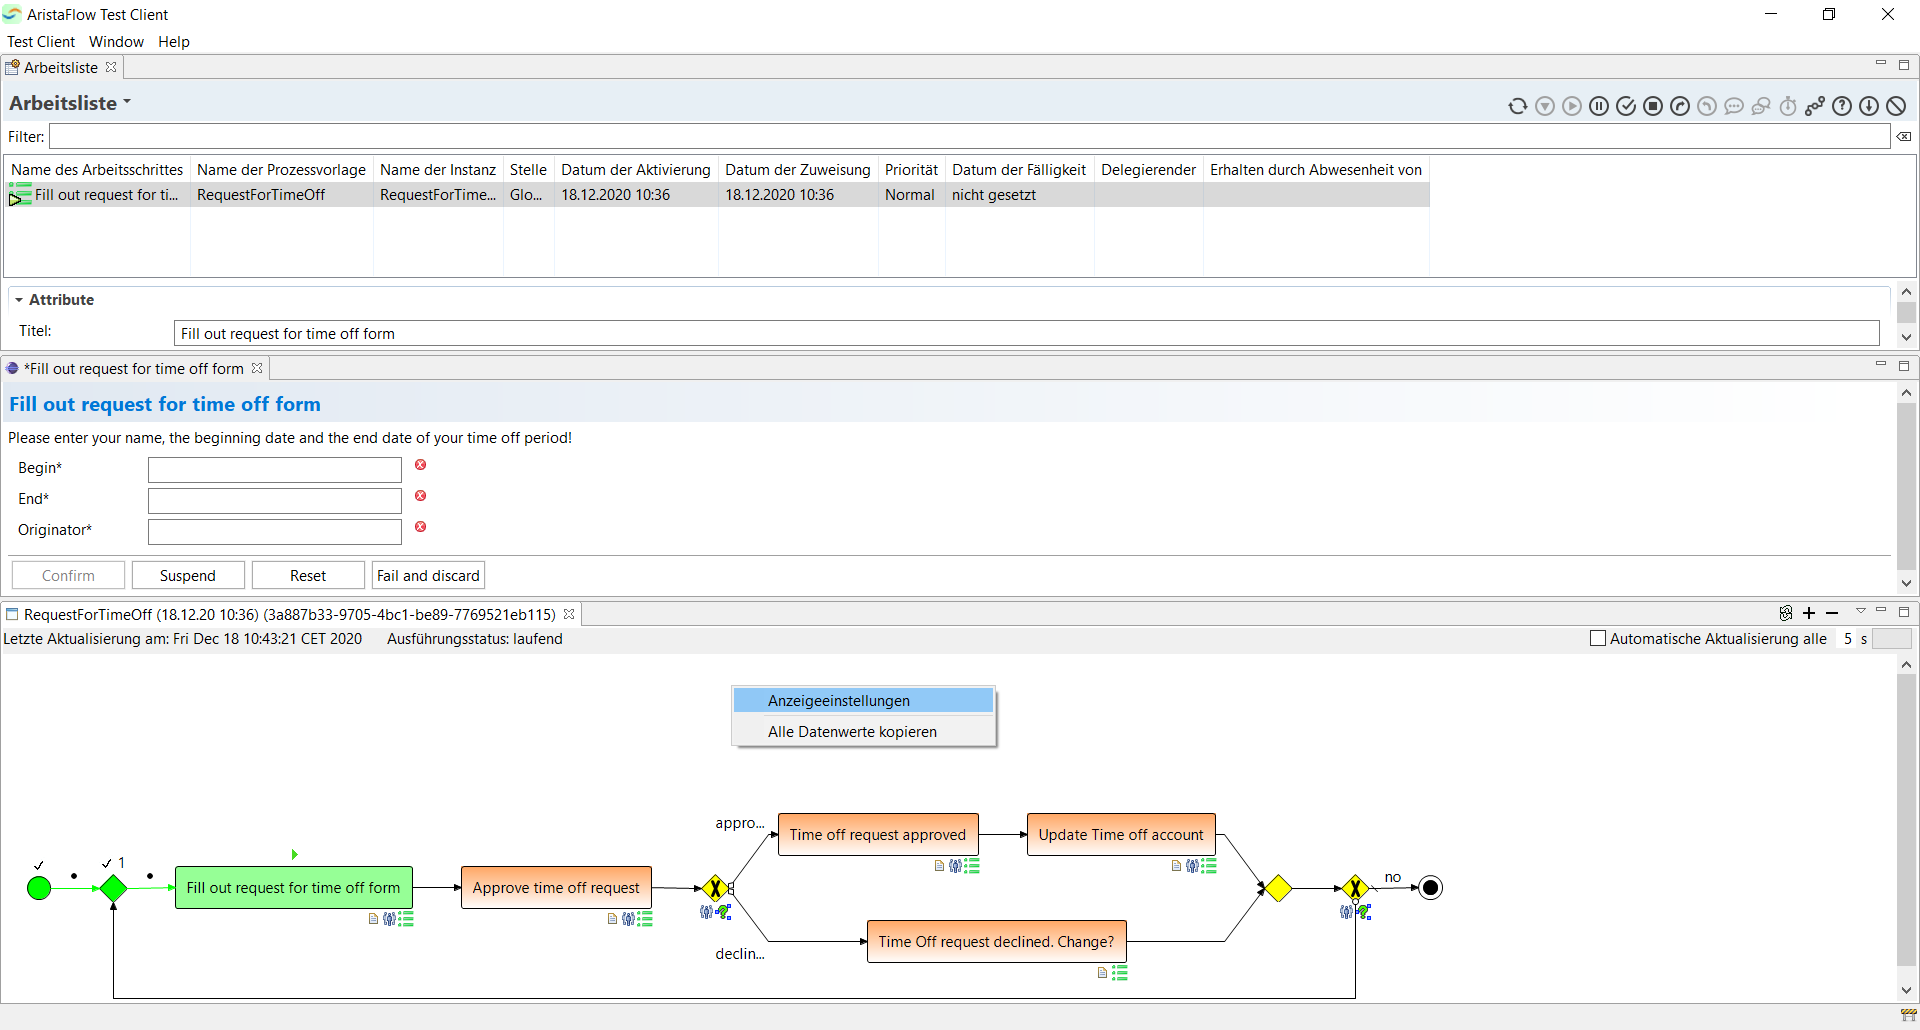
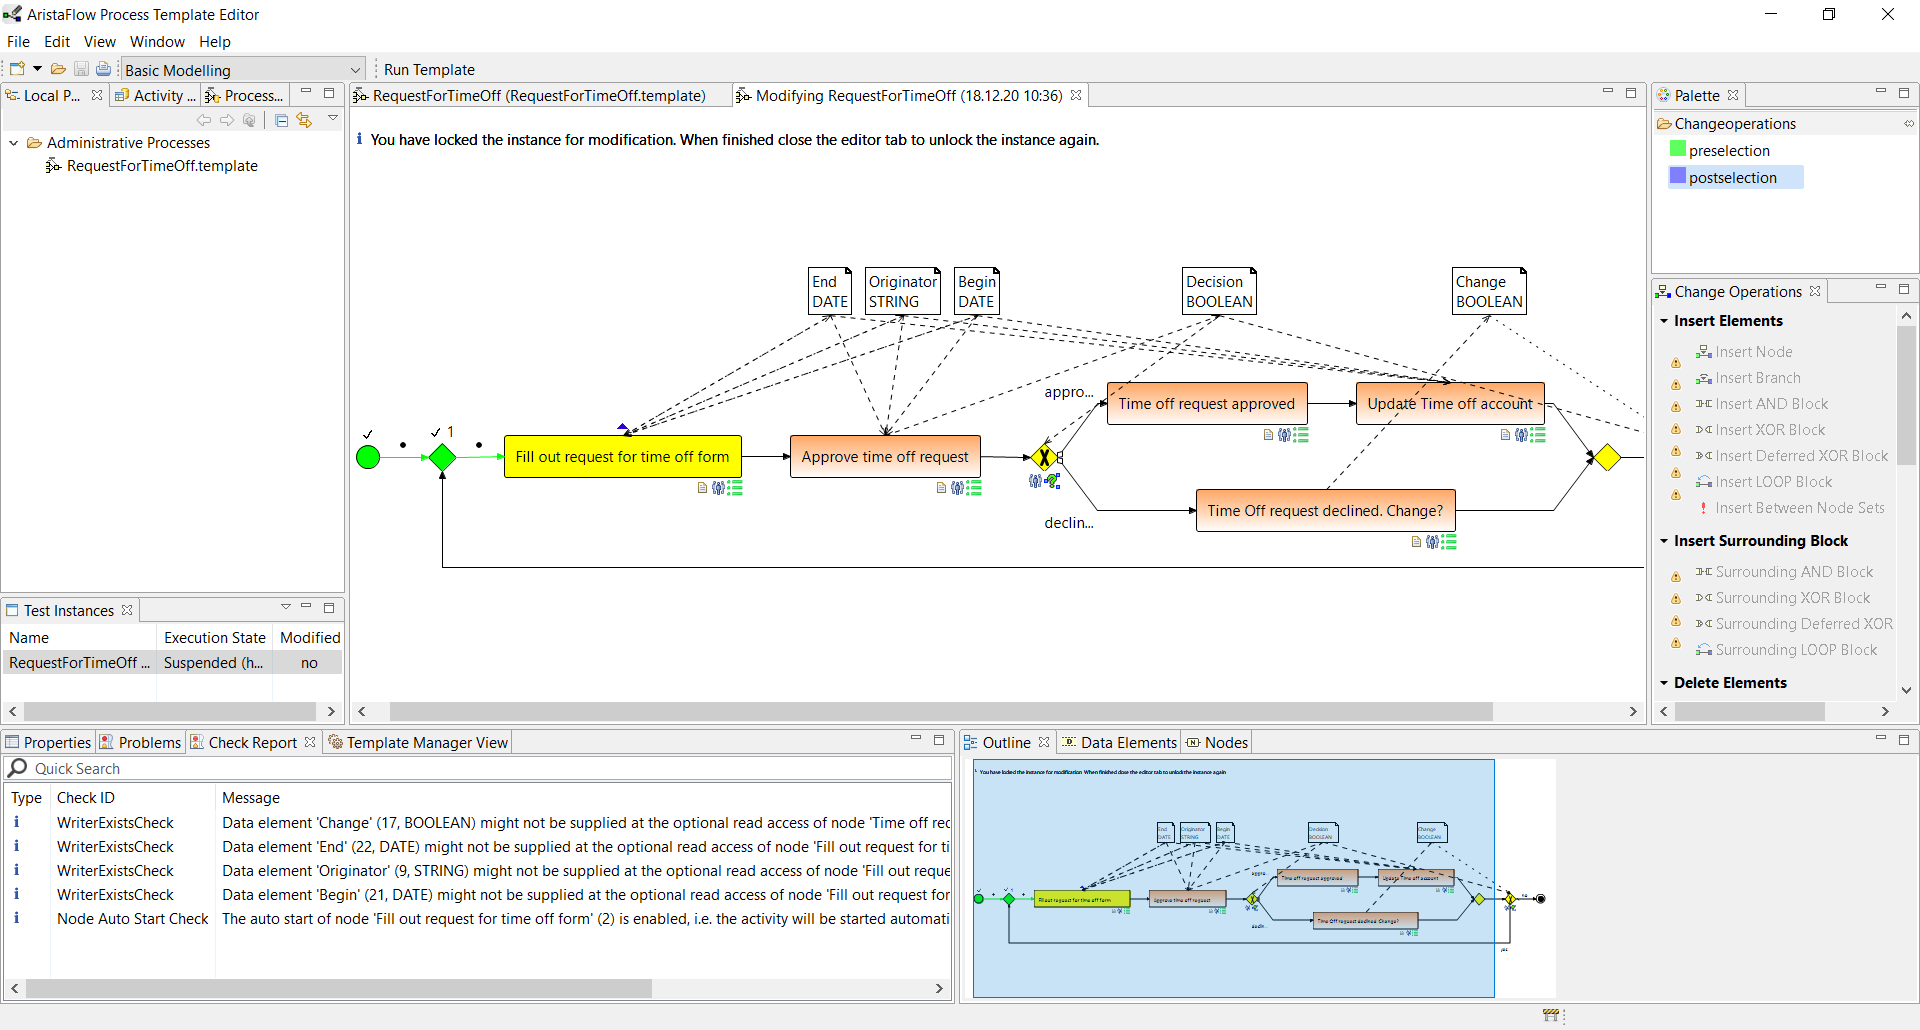
The process is started automatically and you can see that the process step “Fill out Request for Time off Form” is activated in the worklist. The process steps Start and our loop step are only structuring steps which do not have an activity assigned so they are executed by the process engine. To open the real time monitoring of the process press the process chains icon in the upper right corner. You can also enable the automatic update for the execution status by ticking the box on the right above the graph (see screenshot).
Hint:
To display the execution status as usual with BPMN symbols, select BPMN Symbols from the dropdown box in the right-click menu over the graph (see the last screenshot).
If you have auto start enabled for the process step “Fill out request for time off form” during staff assignment, then the activity which we have assigned to this process step (User form) is started automatically. Otherwise to execute the first process step simply double-click the worklist entry.
As we can see, the string input fields in the given form are not very well suited to fill in a Begin and End date. So we close the form with the reset button and we switch back to the Process Template Editor.
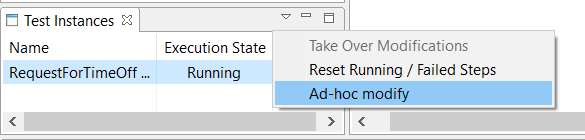
Select the “RequestForTimeOff” process in the Test Instances view and chose Ad-hoc modify in the menu.
Now you can change exactly this process instance which you are testing. We want to change the data type of the Begin and End data elements from String to Date. Since we have data flow correctness checks we cannot directly change the data types of data elements which are connected to process steps which have assigned activities already. The data type of the activity’s / service’s parameters would not match the data type of the data element. In this situation we have a couple of methods to reach our goal (delete data edges, data elements, reassign activities, etc.). In this case we decide to delete the existing Begin and End data elements with type String and create new ones with type Date.
Select the Begin and End data elements and chose the Delete Data Element change operation in the Change Operations view or in the right-click menu. Insert new data elements and change their type to Date in the Properties view.
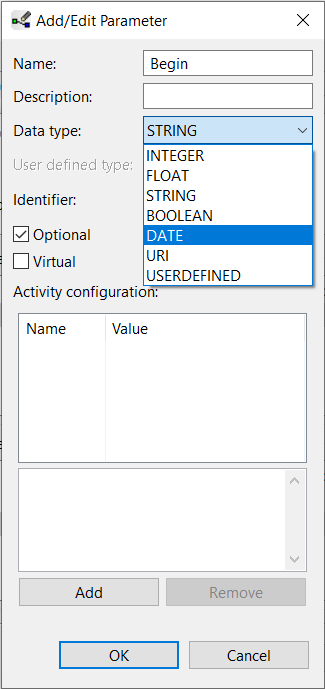
The deletion of the data elements of type String caused warnings on the process steps which were connected to these elements. In the Check Report View the warnings are listed in more detail. To correct the process graph double-click the “Fill out request for time off form” process step. Switch to the parameter wizard page from the first process step, select the Begin parameter and press the Edit parameter button. Change the data type to Date in the upcoming dialogue and press OK.

Do the same with the End Input Parameter and the Begin and End Output Parameters. Click “Next >”. Map the parameter to their corresponding data elements if it is not done automatically. The parameter mapping should look like this now:
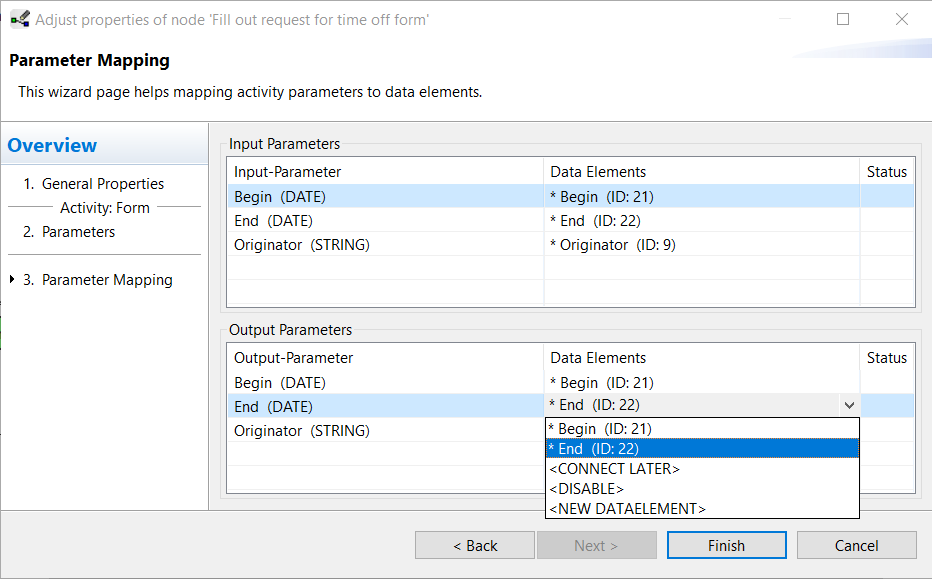
Press the finish button.
Change the other process steps with a warning symbol accordingly. If you are finished the final result should not have any errors or warnings. Save the process change with Ctrl-S and press OK in the upcoming dialogue to commit the changes to the test client. Then close the modifiying editor tab from the instance. The instance were locked in the editor, as long as you edited it.
Switch back to the Test Client and start the “Fill out request for time off form” step from the worklist again by selecting Start in the right-click menu or in the toolbar menu. The String input fields are changed to nicer Date fields.
Enter some test values and close the form with “Confirm”. The process engine changes the execution state of the step to “finished” and activates the “Approve time off request” step which in turn is shown to the user in the worklist.
If you like the changes we have done, switch back to the Process Template Editor and select Take Over modifications. The changes are now propagated from the test instance of the process to the process template.

Go on with the testing of the process and check if the decision rules on the “approved / declined” and on the “Change time off request on decline?” process steps are correct.
If you are satisfied with the process close the Test Client and switch back to the Process Template Editor. In the next step we deploy the process to the AristaFlow Server for productive operations.