
Webform for time off request
That all functions which were demonstrated as well as those which were not demonstrated in the Request for Time off tutorial are also available as a powerful Server-API. This enables you to create your own client applications or to extend ours with further functionality.
For the time off request application process tutorial, a few standard activities from the Activity Repository that we have already integrated into the Process Template Editor are sufficient, such as the user form of the step "Fill out request for time off form" or XOR Predicate for the XOR branch.
However, if you want a more appealing web form instead of the automatically generated user form, you can design this and optimize the “Request for Time off” process via the Webform activity.
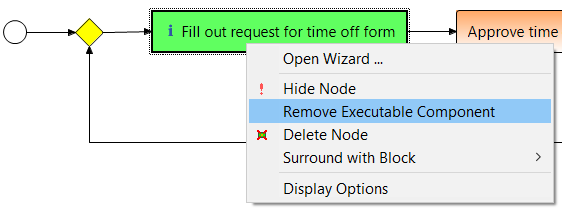
To do this, you must first remove the user form from the step Fill out Request for Time off form via right-click menu ->Remove Executable Component.
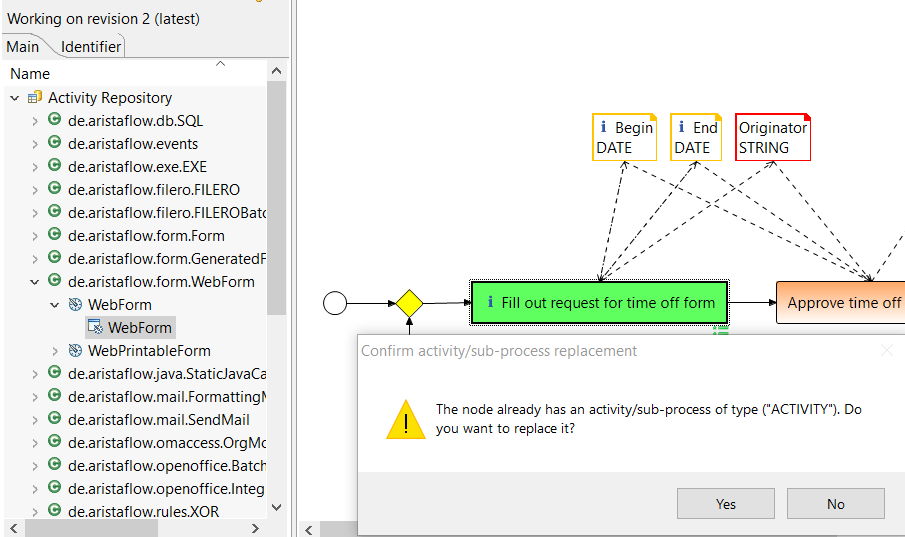
Or you can replace the user form with a new web form using drag & drop.
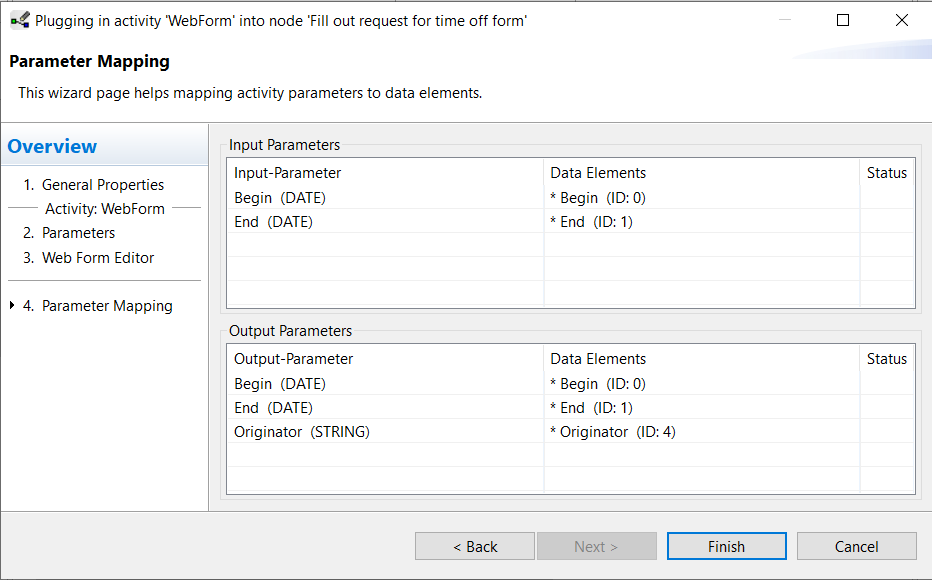
After integrating the web form, the familiar window for supplying the activity with input and output parameters opens. By repeatedly clicking Next, the webform is automatically connected to the required parameters.
WebForm Designer
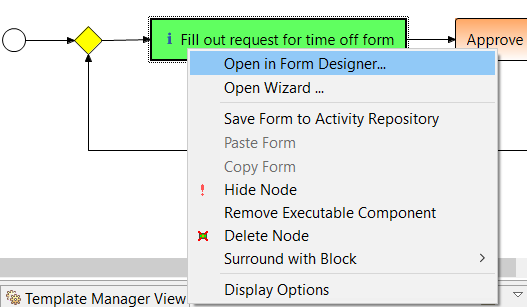
Now you can design the form by right-clicking on the node -> Open in Form Designer...
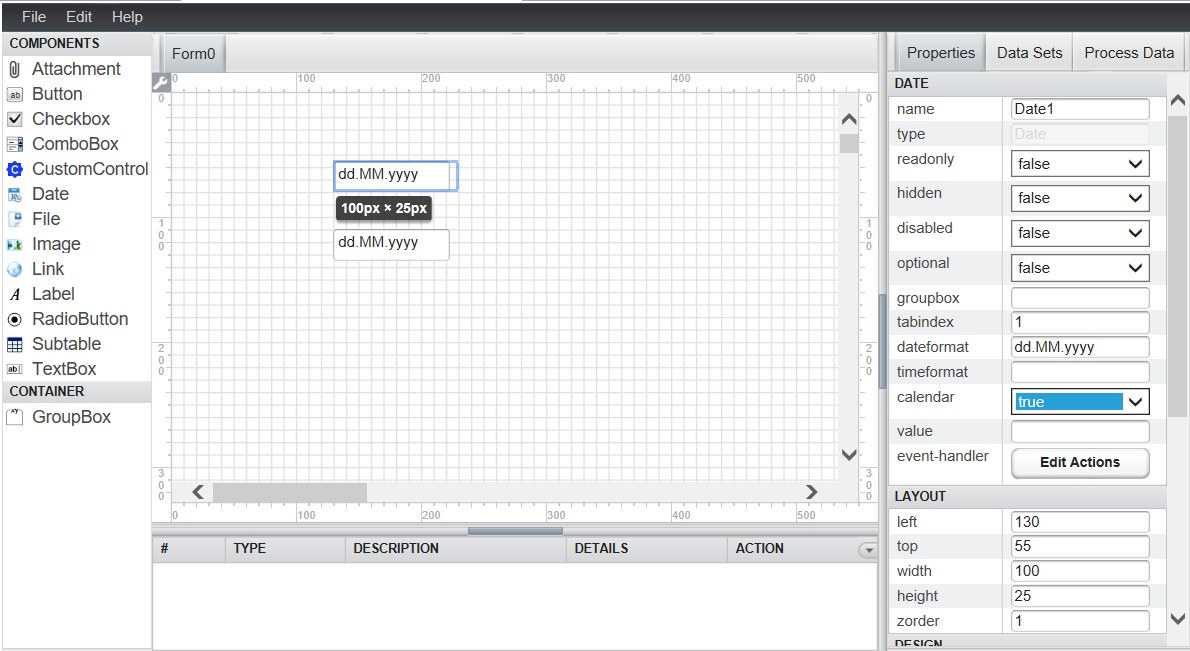
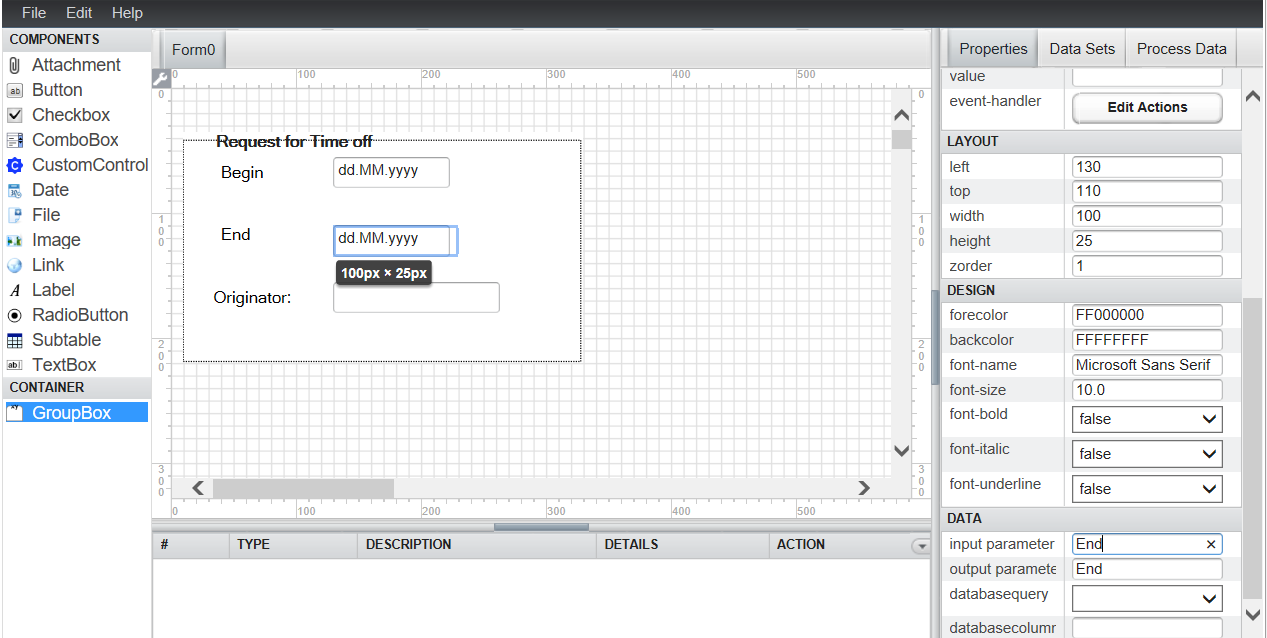
In the designer window, the components are on the left and the properties, such as data sources or design, that can be applied to these components on the right. In our example process, the three parameters (begin of time off, end of time off and originator) must be entered by the user in this step. You need a date component as an input field for the begin and end of the time off. Components are inserted here using drag & drop. Drag two data fields onto the form and integrate the calendar function in these fields. To do this, select the date field and set calendar to true in the Properties tab.
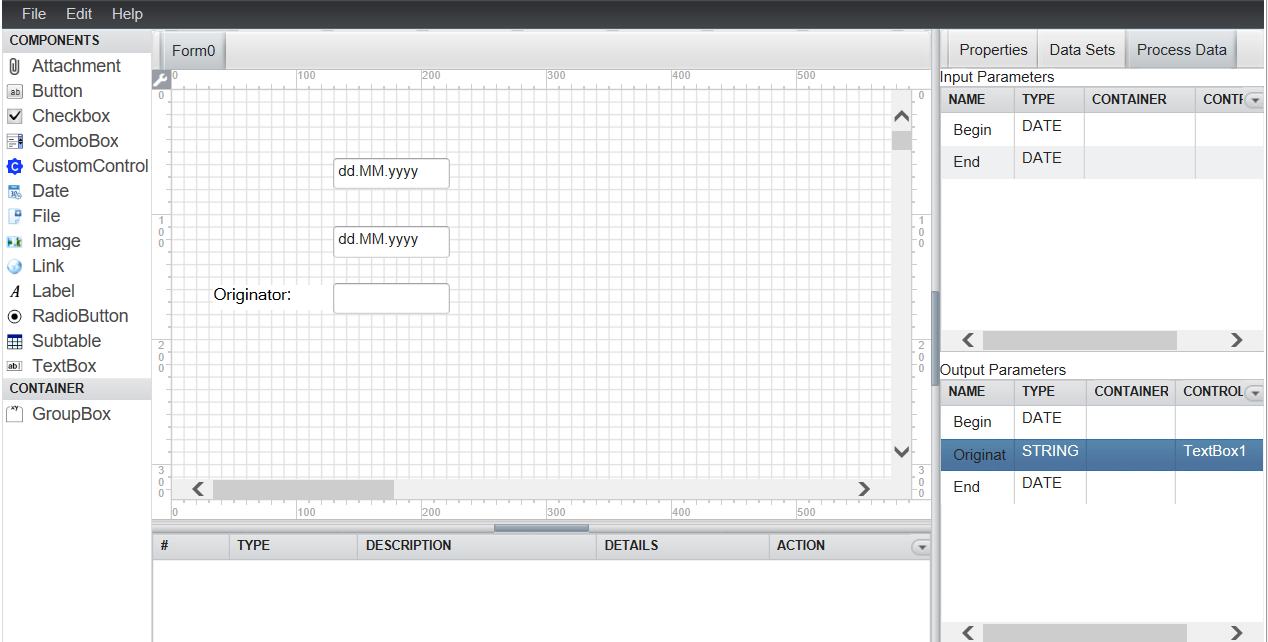
Alternatively, you can create the input fields from the right in the Process Data tab with the help of input and output parameters using drag & drop. For the originator, for example, first mark the second line "Originator" under Output Parameters (blue marking) and place it on the form. This is also how the label is created with the input field. Otherwise you have to add the label explicitly.
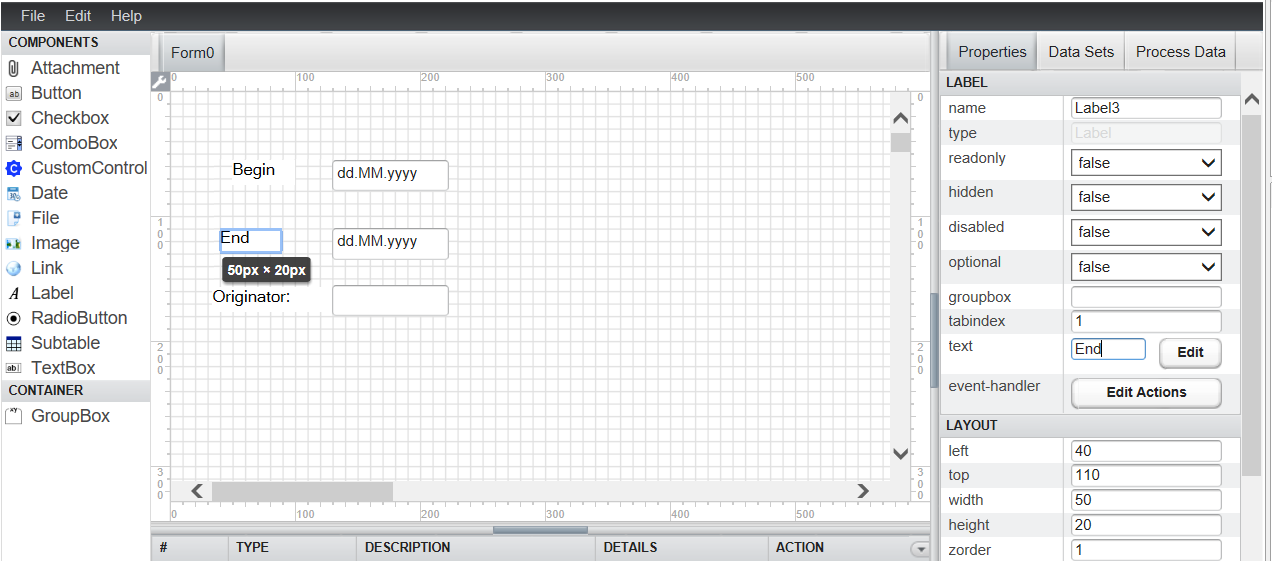
Now use drag & drop to set the labels for the two date components. You name the labels according to the output parameters under the Properties tab (top right). Enter the text for the labels at Text, and click Edit. Confirm the opened Translations window with Ok (see screenshot).
Component GroupBox
You can group the components with a GroupBox Request for Time off to form a form. After creating the input fields, you have to connect them to parameters (if they were not created by drag & drop from the right, i.e. via Process Data). To do this, you connect the input and Output parameters again via drag & drop with the corresponding input fields.
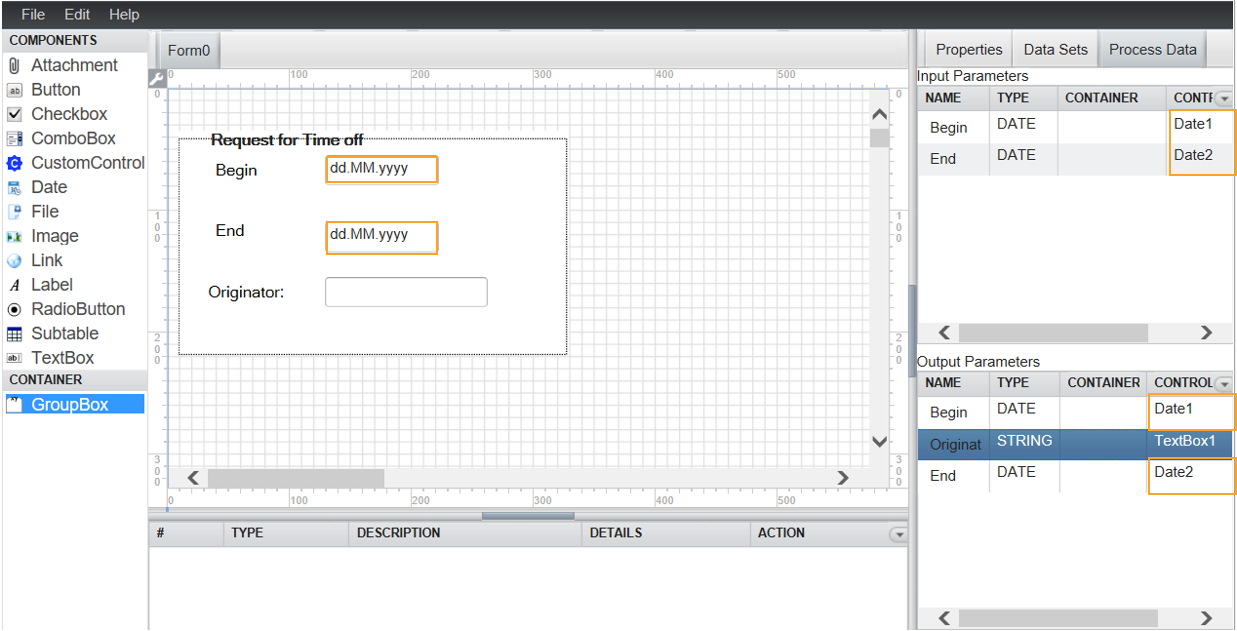
It is highly recommended to check the correct assignment of the parameters before using the form. To do this, after selecting the individual field under Properties -> DATA, check whether the input and output parameters match the corresponding field.
Event Handler
Next, you can trigger events in the input fields and thereby control user input. For example, you can use events to check whether the time off begin date entered is before the current date or after the end of the time off. To do this, you have to store small Javascript functions in events.
To insert events, go to the Begin input field and click Edit Actions (center right). In the opened Script Event Actions window, insert an event Add event action.
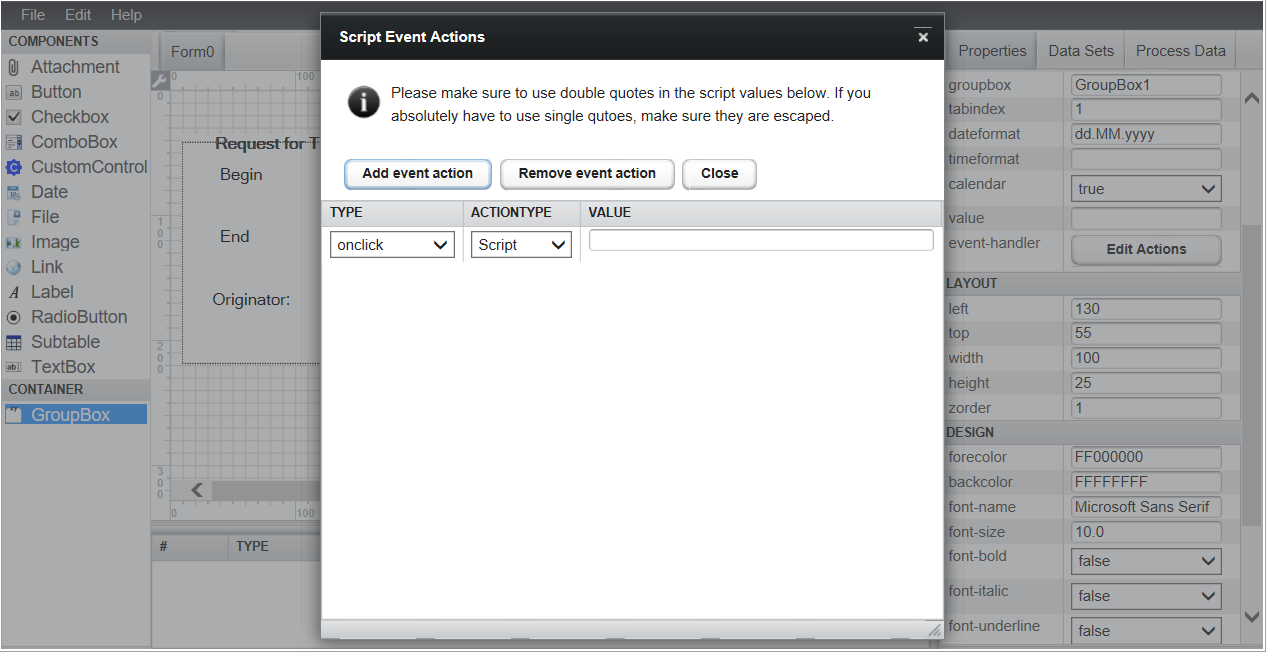
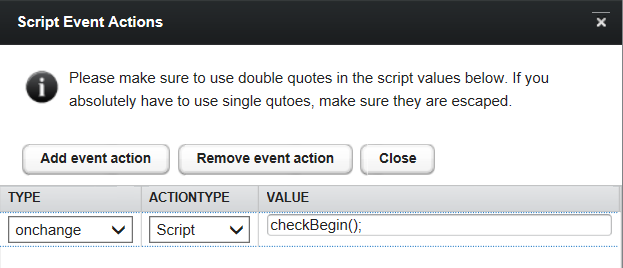
The check to determine whether the begin of time off is before tomorrow's date should take place each time the first field is changed. Therefore you select Onchange as the event Type and leave the Actiontype on Script.
Now enter the name for the Javascript function with brackets and a hyphen such as checkBegin(); under Value. Close the window by clicking on Close.
The checkBegin() function must now be implemented in the script editor. Open the Script Editor by clicking on Edit (top left in the Designer Editor menu) and select Scripts.... In the Script Editor, enter the code under JavaScript as shown in the screenshot and save by clicking on OK.
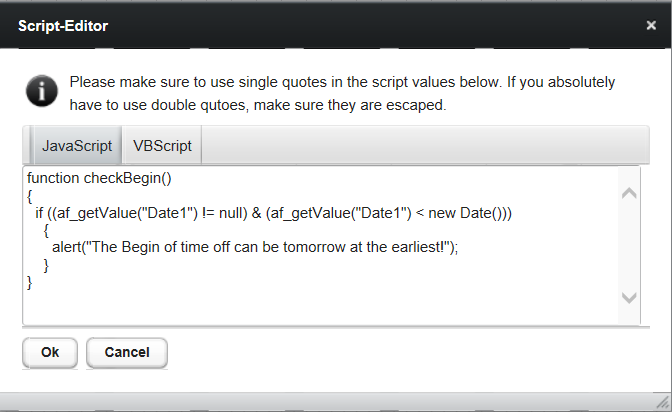
Date1 is the internal name for the textbox Begin of time off and the value entered is read out with the af_getValue() function.
function checkBegin()
{
  if ((af_getValue("Date1") != null) & (af_getValue("Date1") < new Date()))
    {
      alert("The Begin of time off can be tomorrow at the earliest!");
    }
}
Enter the code in the JavaScript editor for the checkEnd(); function as shown in the following screenshot. Pay particular attention to the brackets and hyphens. Date2 refers to the end of time off.
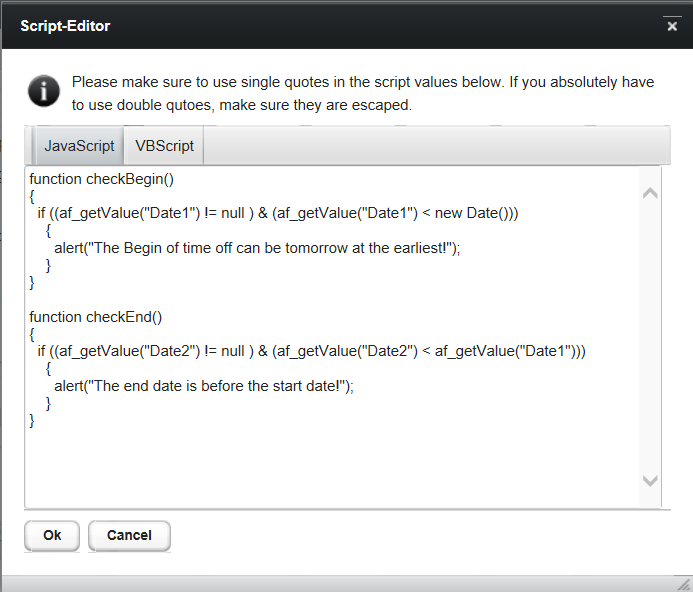
function checkEnd()
{
  if ((af_getValue("Date2") != null) & (af_getValue("Date2") < af_getValue("Date1")))
    {
      alert("The end date is before the start date!");
    }
}
Test the webform in the Test Client
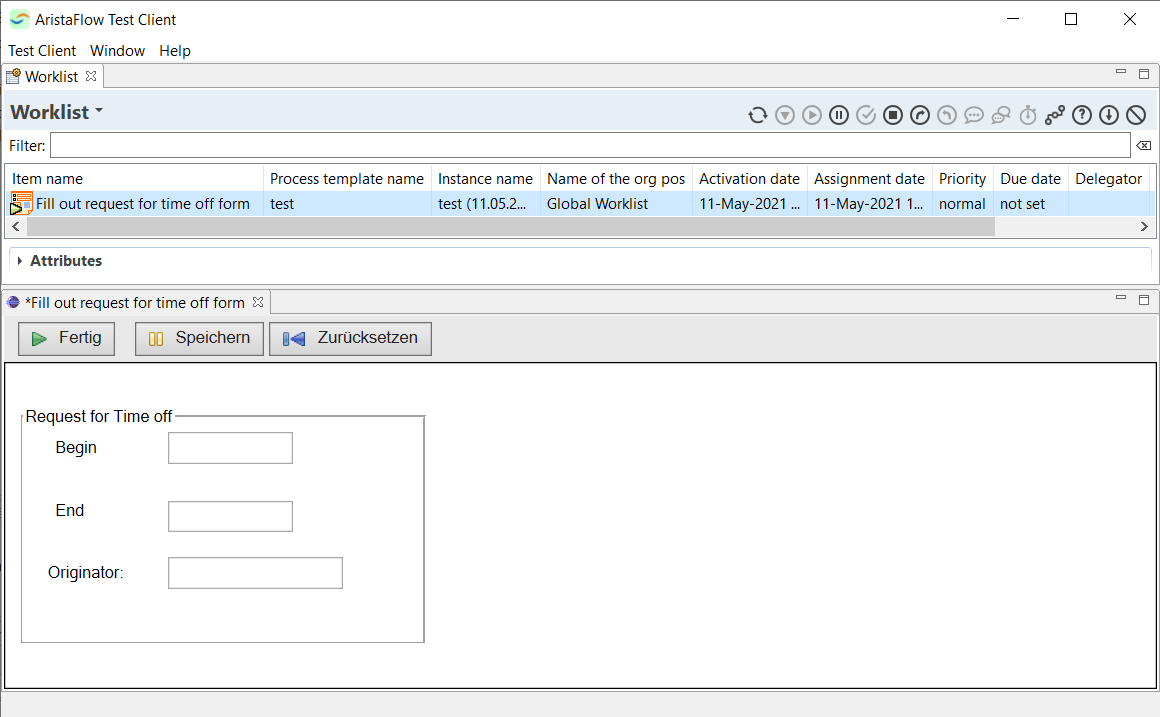
After saving the changes, you can test the web form for functionality in the
Test Client. Select the template and
click on Run Template in the Process Template Editor. The Test Client
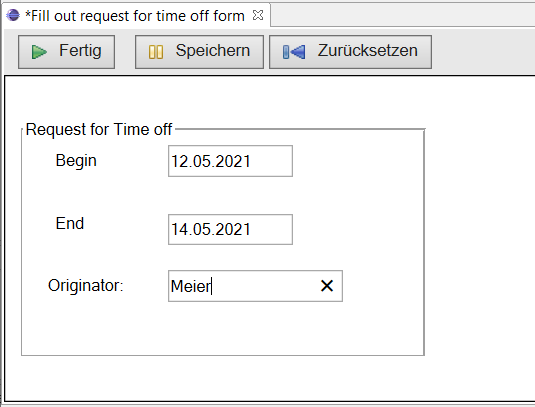
opens with the newly created webform. The form already contains
pre-implemented buttons for sending, suspending and resetting
(Fertig, Speichern, Zurücksetzen).
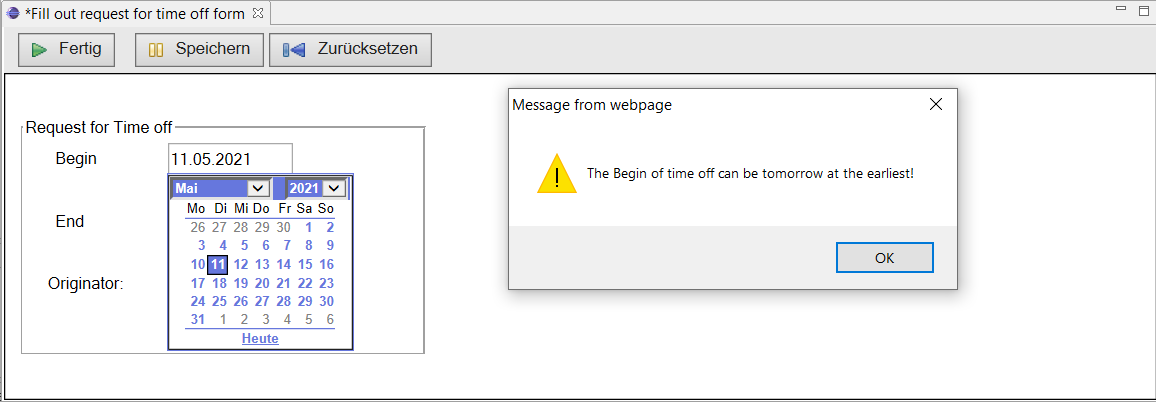
Choose a date from the calendar. If today or an earlier date is selected as the date, the implemented error message appears, which informs the user of an incorrect entry.
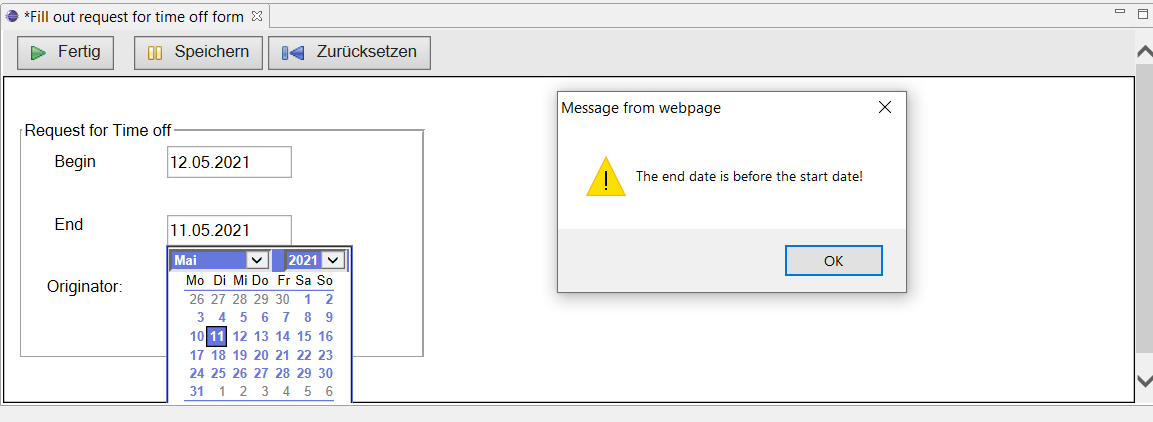
In the same way, an error message appears if the end date is before the start date.
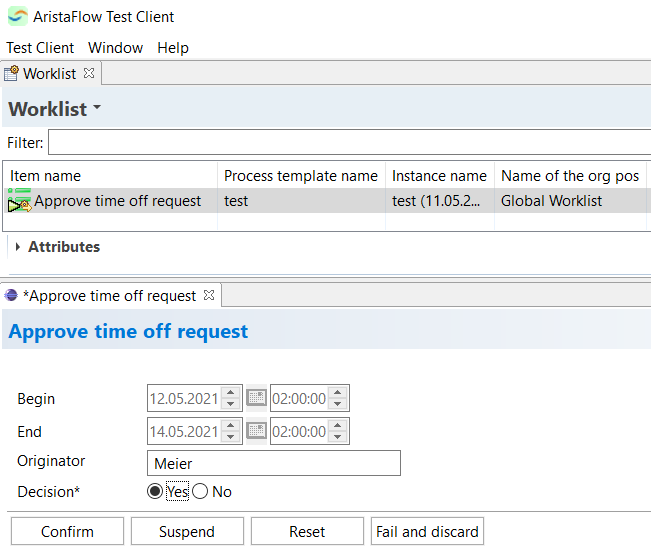
Enter the name of the originator and submit the form using the Fertig button.
In the next step, Approve time off request, you will find the data sent by Webform.
If you’re still not satisfied with your Request for Time off process, contact us and we will show you some more features to optimize the process. The following optimizations will we explained step by step:
- The name of the originator should be added to the name of the worklist items to get a better separation of different request for time off originators.
- To enter your own name in a Request for Time off form is ugly. The name of the originator should automatically calculates and send to the form of the manager.
- The time off account should be updated automatically using a database component.
- The human resource staff should only inspect the automatic update of the time off account.